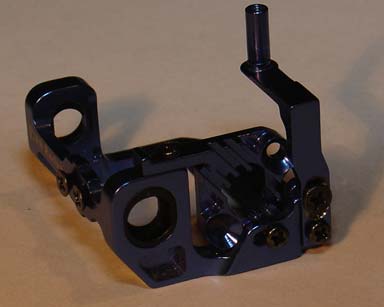
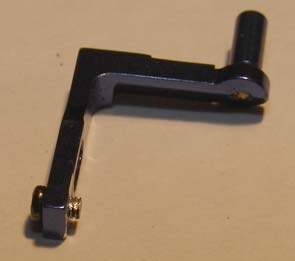
 PN 94mm LCG Motor
Mount Modification PN 94mm LCG Motor
Mount Modification
PN 94mm LCG Motor
Mount Modification PN 94mm LCG Motor
Mount Modification
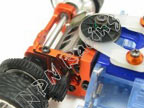
Usually, release of a great performing mount would be the end of the story. However, many users were highly frustrated by the damper post arm. The damper post holder is held on by a single screw like most motor mounts. However, since this screw is located lower in the mount than your typical 94mm motor mount, there is increased leverage on the spring force from the the shock. That is if you are using a rear shock. Increased leverage causes the arm to tilt backward with vibration from running the car. Having to reposition the arm every couple of laps was not too acceptable.
This guide shows two ways to solve the issues. One is the quick and simple method. The other requires a 1.6mm drill and a hand file. Don't be scared off by the more involved second method. Is not as hard as it looks. It is only a little time consuming. Takes about an hour to modify it the first time. Aluminum is quite easy to machine, so a hand drill is enough to get it done.
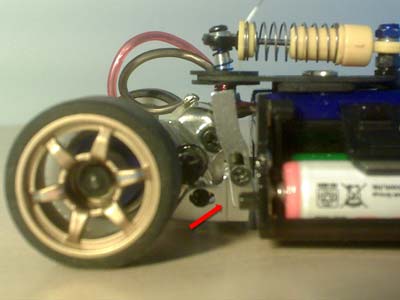 Damper post
arm tilting back. Photo came from babstar on the Mini-ZRacer.com Forum.
Damper post
arm tilting back. Photo came from babstar on the Mini-ZRacer.com Forum.
The fast method is to use a long screw coming in from the inside of the motor mount. Use a steel wheel nut to fasten the damper post arm. As steel is stronger than aluminum, you can tighten the nut with much more force than you can screwing the screw in the tapped hole in the aluminum. For the most part, this will prevent the damper post arm from tilting back. However, using a center spring sometimes can still move the arm backward. If you sand away the anodize on the arm and on the motor mount where they contact each other to create a rough surface, this method may be fine. I had some old superglue still on the arm when I tried to glue the arm to the motor mount. The rough surface from the superglue made this a very strong joint.
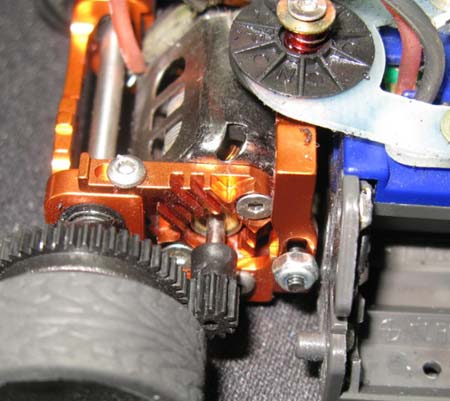
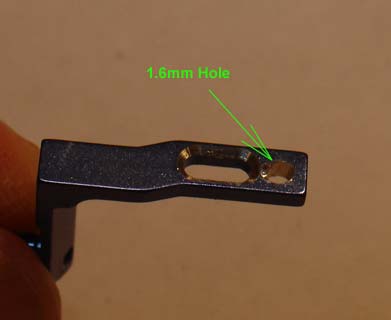
This is the right way to solve the damper post arm problem. I did this with a hand drill and a file. The key to getting this right is drilling a 1.6mm hole in the center of the arm. The hole should be 2mm from the bottom and 2mm from both sides. Start the hole with a sharp punch or a small nail so the drill don't wander. As you are drilling, if you think your hole is slightly off, tilt the drill bit to get back to the center again. You can see on the picture below that the hole is slightly oval because I had to tilt the drill bit to get back to center. Turns out I was using a broken drill that wandered all over the place.
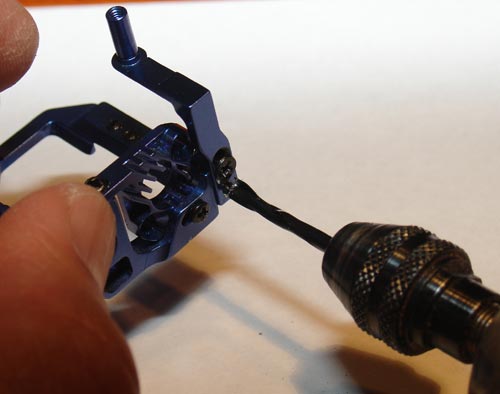
After the hole is drilled in the arm, fasten the arm to the motor mount. Using the hole in the arm as a guide, drill holes a series of holes in the motor mount. Start with the arm all the way in one position, drill a hole that is about 1.5mm deep into the motor mount. Use a piece of tape on the drill to tell you when to stop. Move the arm 3/4 of a diameter over after each hole. This is a match drilling operation because you are using the hole on one piece to drill another piece. The result will be a perfect fit.
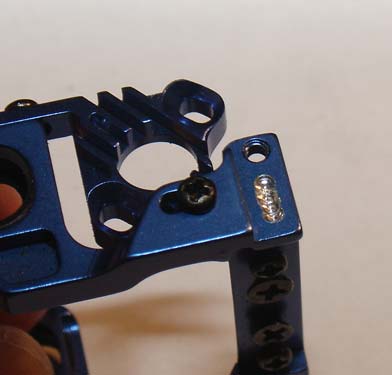
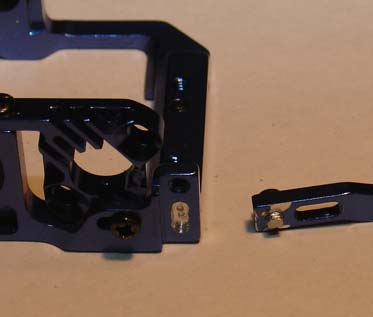
Here it is right after finishing drilling 4 holes next to each other on the motor mount.
Use the same 1.6mm drill bit to clean out the ridges between holes. Only one or two passes with the drill bit tilted is all it takes to clean out the ridges. If you have a Dremel, you can make the slot even smoother.
Next is to fasten a screw into the hole on the arm. Use a short screw that is supplied with the motor mount. Don't worry about tapping the arm first. The steel screw pretty much taps itself into the aluminum. As a bonus, it is a tight fit, so it won't come back out with vibration.
Use a small hand file to file the threads away on the sides of the screw. I used a Dremel to go faster. Check the fit of the screw in the slot on the motor mount frequently.
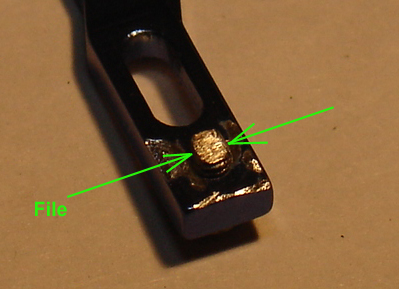
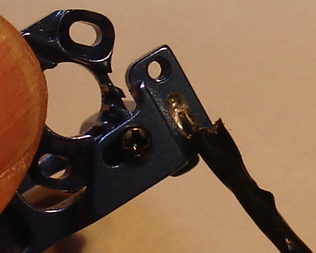
Here is the finished work.
With a little bit more sanding, the arm slides smoothly up and down. Because the slot is match drilled to the arm, there is very little slop and almost no misalignment between the arm and the motor mount. Pretty amazing for a hand machine job. Is all in the method used. Now it is easy to adjust the arm, and it will never tilt again.